How to use Check My Links Extension!
Check My Links browser extension
Check My Links is a powerful browser extension designed to simplify link validation. Ensure your website’s links are functional, enhance SEO, and provide a seamless user experience effortlessly. Try it now!

How to Use Check My Links: Your Quick Guide!
Using Check My Links is a breeze—even if you’re not a tech wizard. 🧙♂️ Here’s how to install and use it like a pro:
1. Install the Extension
- Just Click Here: Check My Links
- Click “Add to Chrome” .
2. Pin the Extension (Optional but Handy!)
- Click the puzzle piece (extensions icon) in the upper-right corner.
- Find Check My Links in the list.
- Click the pin icon to keep it visible on your toolbar.
Now it’s ready for action!
3. Scan a Web Page
- Open the webpage you want to check .
- Click the Check My Links icon on your toolbar.
- The tool will start scanning—you’ll see the link statuses appear in seconds .
4. Understand the Results
- Green: Valid links (All good!)
- Red: Broken links (Uh-oh! Fix these)
- Yellow: Valid redirects (Heads up, it’s a redirect!)
Hover over any link to see its URL and status code.
5. Customize Settings
Want to tweak the tool to suit your needs?
1. Click on the Settings icon ⚙️ in Check My Links.
2. Here’s what you can customize:
- Highlight Colors: Change the colors for valid, broken, or redirected links.
- Blacklist: Exclude specific links or URLs from scans.
- AutoCheck: Enable automatic link scans when the page loads.
- Warnings: Turn on warnings for empty or missing href attributes.
6. Export Link Data
Need a record for reporting or analysis?
- Click Export All to download a CSV file with all links and their statuses.
7. Refresh the Scan
Made updates to the webpage? 🗘️
- Simply hit the Refresh button in Check My Links to rescan.
8. View Links Without Downloading
Prefer a quick glance?
- Click View All to see the list of links and their statuses right on your screen.
And That’s It!
In minutes, you’ll have a clean, functional webpage—free of broken links. ✅
No stress, no mess, just smooth sailing with Check My Links 🚀.
🌟 Pro Tip: Use it regularly to keep your site sharp and visitors happy!
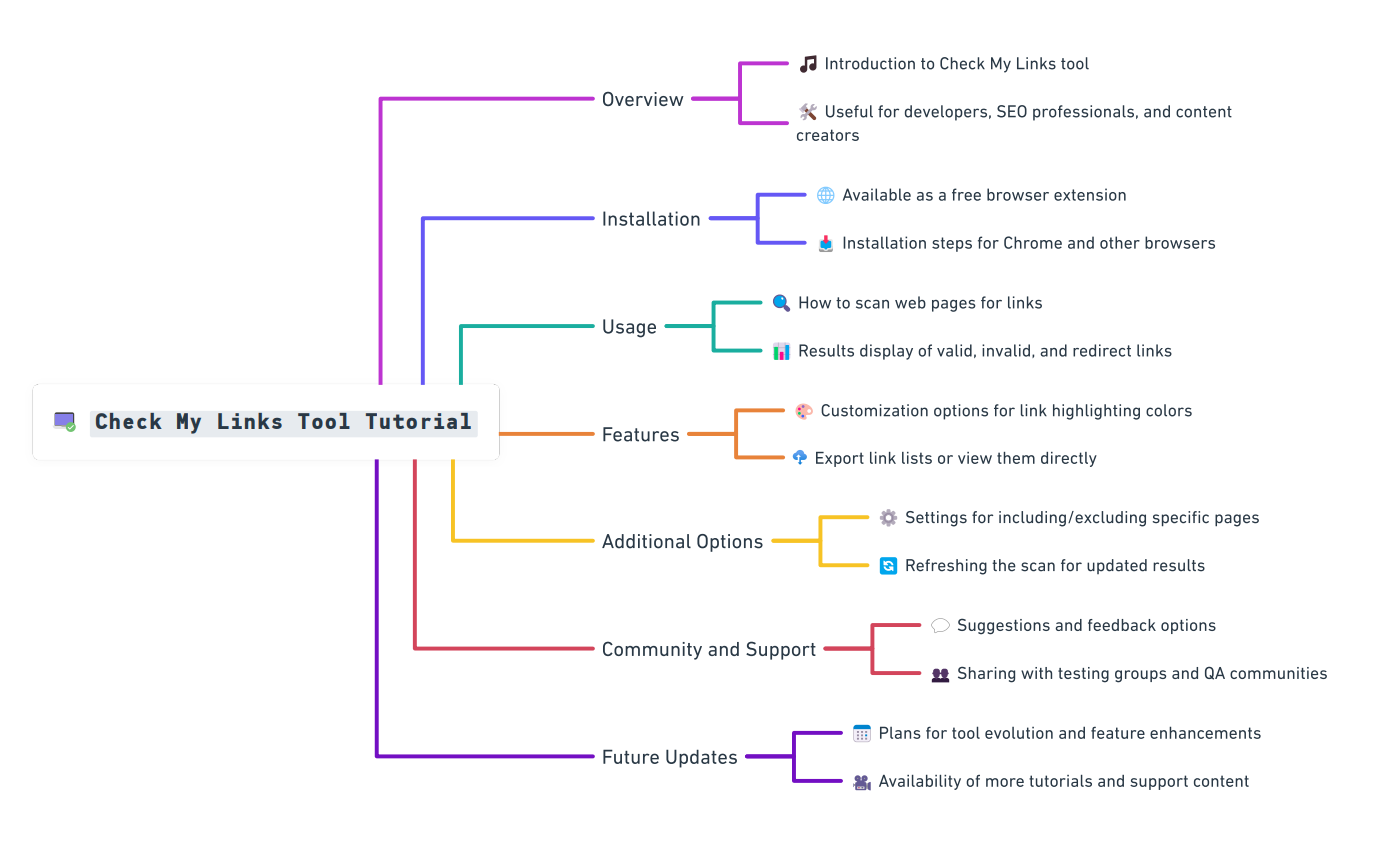
Summary
Check My Links is a free browser extension that quickly identifies
broken, valid, and redirect links
on web pages, aiding developers and SEO professionals.
Highlights
- Free Tool: A free browser extension available for multiple browsers.
- Fast Scanning: Scans web pages and identifies link statuses in just a few seconds.
- Detailed Reports: Comprehensive results, including valid, invalid, and redirect links.
- Customizable Colors: Allows users to change highlight colors for different link statuses.
- Export Options: Ability to export link data or view links directly.
- Refresh Functionality: Quickly refresh scans for updated statuses.
- Wide Accessibility: Compatible with Chrome, Edge, Opera, and other Chromium-based browsers.
Key Insights
- Efficiency Booster: Reduces time spent on link checking, making it invaluable for developers and content creators.
- User-Friendly Interface: Straightforward installation and usage, suitable for all skill levels.
- In-Depth Link Analysis: Categorizes broken links, helping users prioritize fixes—critical for SEO.
- Customizability Enhances Usability: Changing highlight colors aids visual distinction between link statuses.
- Export and View Options: Provides flexibility with options to export or directly view link data.
- Dynamic Updates: Refresh feature ensures the latest information without reloading the page.
- Community and Support: Backed by an active user base and regular updates, ensuring it remains a top tool for web maintenance and SEO.
Learn More
General FAQ
Is Check My Links free to use?
Yes, Check My Links is a free browser extension available for multiple browsers.
Can Check My Links detect redirects?
Yes, the tool identifies valid redirect links, allowing users to manage both broken and redirecting links effectively.
How often should I use Check My Links?
It is recommended to use Check My Links regularly, especially after significant updates to your website or whenever you add new content.
Can I use Check My Links on mobile browsers?
Currently, Check My Links is primarily designed for desktop browsers. Mobile browsers may not support the extension.
What happens if I find broken links?
If you encounter broken links, you should update or remove them to prevent negatively impacting user experience and SEO.
Can I customize the colors for link statuses?
Yes, Check My Links allows users to customize the color coding for different link statuses according to their preferences.
Will Check My Links work on all websites?
Check My Links works on most websites, but restrictive settings on some sites may limit its functionality, hindering its ability to verify links effectively.
Can I exclude certain links or pages from the scan?
Yes, the extension provides options to include or exclude specific pages or links based on your needs.
Recent Post