How to add new columns in TestCase Studio?
September 04, 2023
You can add a new column in Test Case Studio whenever you want or with any name you can add. So this feature is currently available in Test Case Studio pro version.
Adding Custom Columns in Test Case Studio
Test Case Studio Pro allows you to easily add custom columns to your test cases. Follow these steps to do so:
Open Test Case Studio: Click on the Test Case Studio logo to open the application.
Default Columns: By default, Test Case Studio includes columns such as step number and URL.
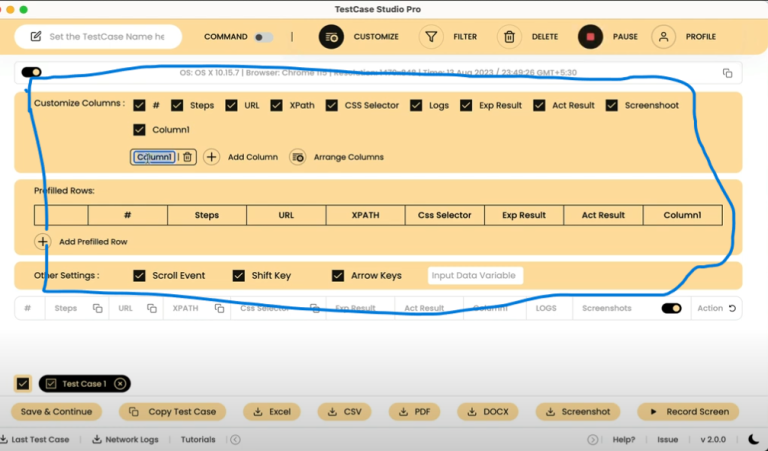
Customize Columns: If you need to add additional columns, such as an ID for the type of work, follow these steps:
a. Click on the “Customization” option.
b. Select “Add Column.”
c. Enter the name of the new column, for example, “Job Type.”
d. Click anywhere in the interface to add the column. It will appear alongside existing columns.
e. Repeat this process to add as many custom columns as you need.
Reordering Columns: To rearrange columns, simply:
a. Select the column you want to move.
b. Drag and drop it to your desired position.
c. Arrange columns in any order that suits your needs.
Recent post
5. Saving Changes: If you wish to save your custom column settings:
a. Click “Save” in the customization menu.
b. Alternatively, you can leave the changes without saving if needed.
6. Renaming Columns: To rename a column:
a. Double-click on the column’s name.
b. Edit the name as required.
c. Press Enter to confirm the new name.
7. Deleting Columns: If you accidentally add a column or no longer need it:
a. Select the column you want to remove.
b. Delete it using the provided options.
This simple and flexible customization feature allows you to add, rename, reorder, and delete columns in Test Case Studio at any time, making it a versatile tool for your testing needs.
For more details please refer this video-
Most Popular