How can I use TestCase Studio Pro to upload steps, screenshots, and create a bug directly in Jira?
How to use:
To upload steps, screenshots, and create a bug in Jira directly from TestCase Studio Pro, Follow these steps:
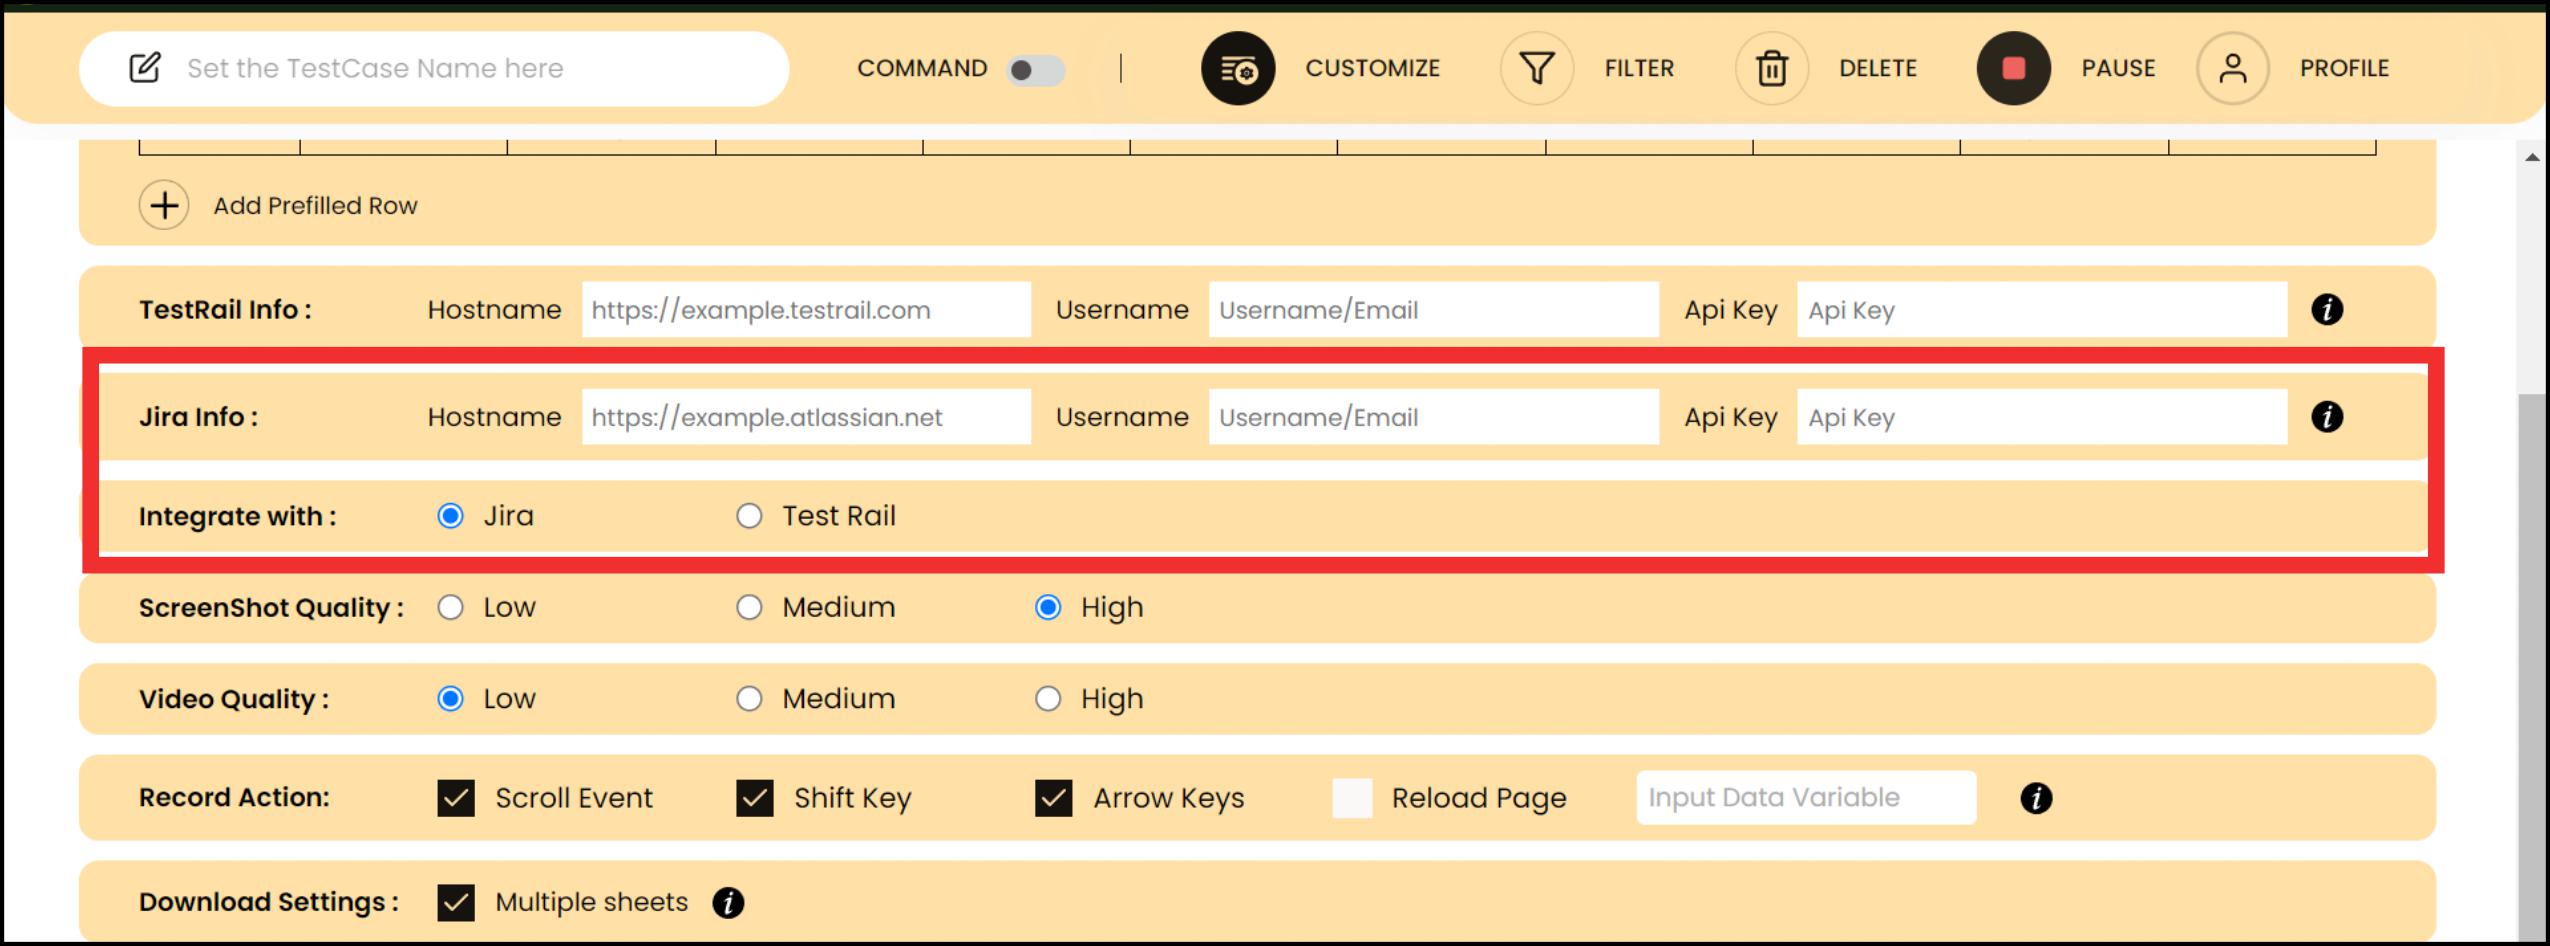
1. Set Up Jira Integration:
Open TestCase Studio Pro and go to the settings or customization section.
Select Jira as the integration option instead of TestRail
Enter the required Jira information:
Hostname: Copy the URL from your Jira dashboard and paste it here.
Username: Use your email ID associated with Jira.
API Key: Generate an API token From your Atlassian account settings under the security section Create a new token, name it (eg, TCSP create), and copy the key.
Paste the API key into TestCase Studio Pro The settings will be saved automatically.
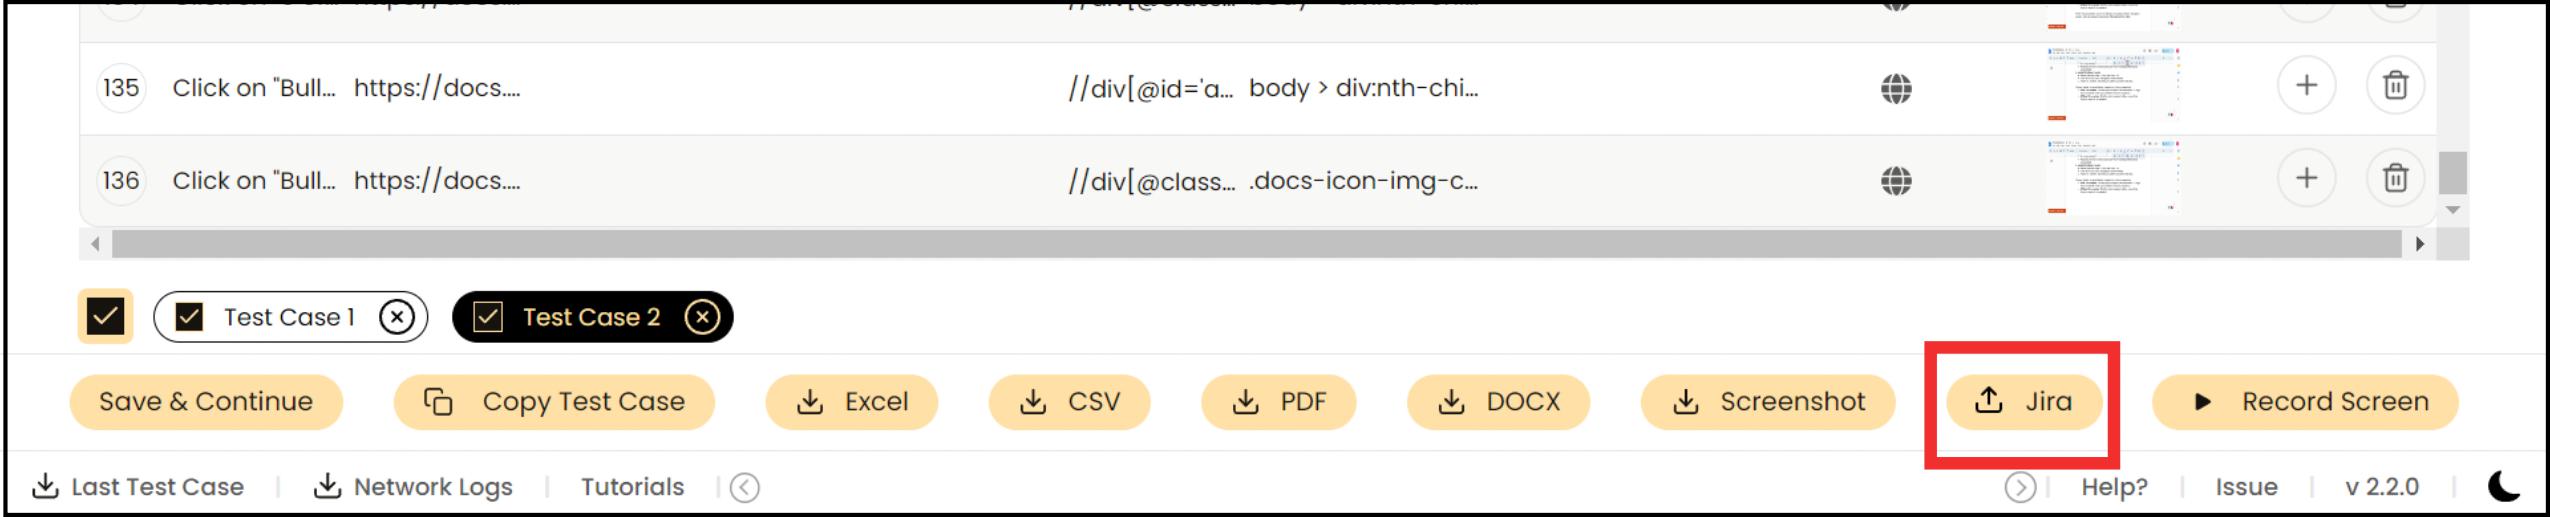
2. Upload Test Cases to Jira:
Record your test cases in TestCase Studio Pro.
Click on the Jira button that appears in the interface.
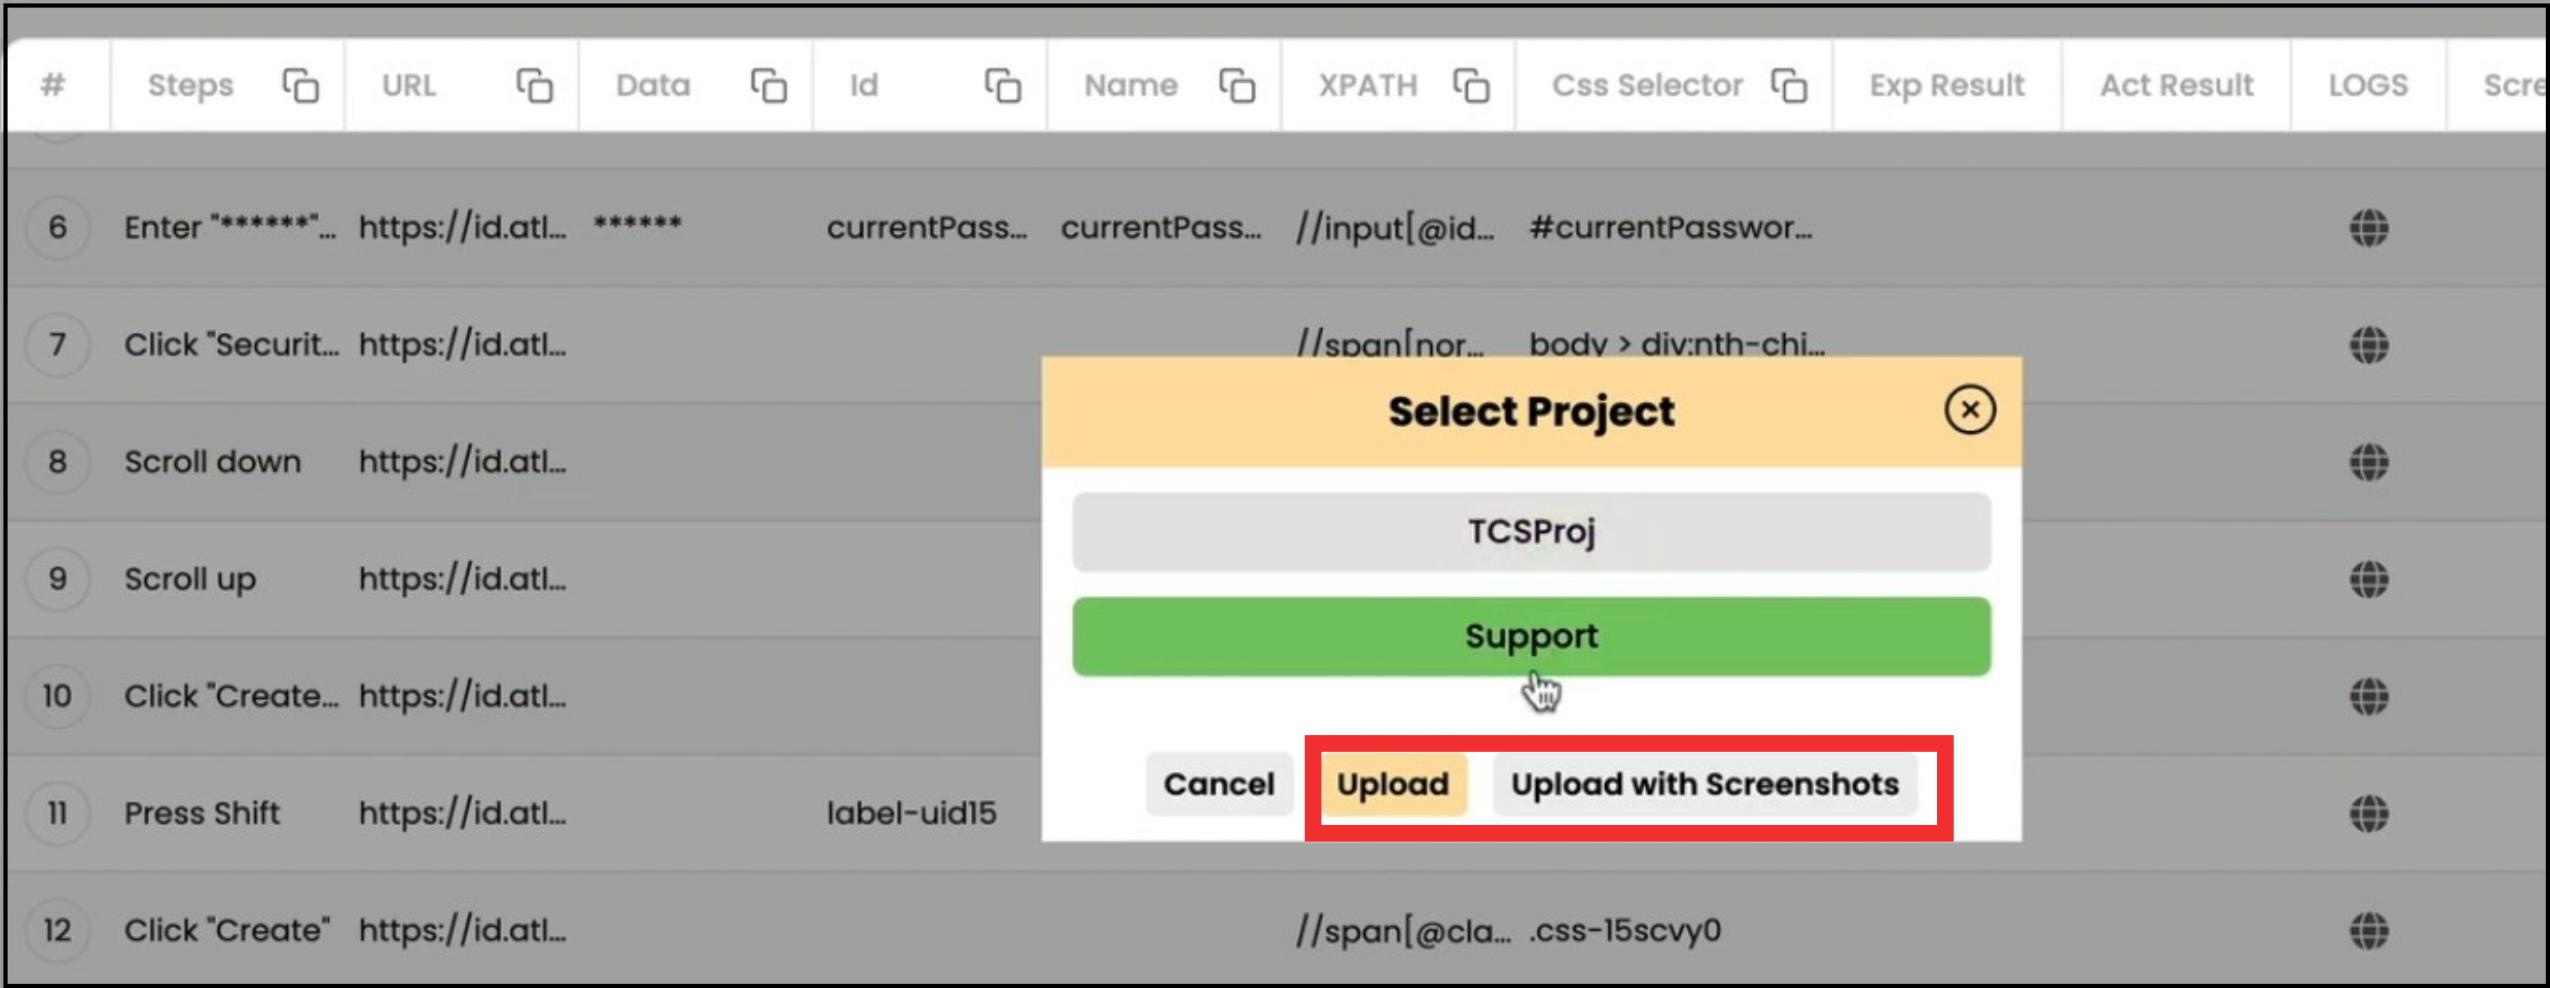
Select the project in Jira where you want to upload the test case.
Choose whether to upload the test case with or without screenshots:
With Screenshots: Click the option to upload with screenshots. All steps and screenshots will be uploaded to the selected Jira project.
Without Screenshots: Click the option to upload without screenshots. Only the steps will be uploaded.
Verify the uploaded test case in the selected Jira project under the description section, where all steps and screenshots (if included) will be visible.
3. Manage Multiple Test Cases:
If you have multiple test cases, select the ones you want to upload.
Uncheck any test cases you do not wish to upload at the moment.
Rename the test cases if necessary before uploading.
Click on the upload button to upload the selected test cases to Jira.
This process allows you to seamlessly integrate and manage your test cases and bugs in Jira directly from TestCase Studio Pro.