To control the screen recording quality in TestCase Studio Pro first, the user needs to adjust the settings then Follow these steps:
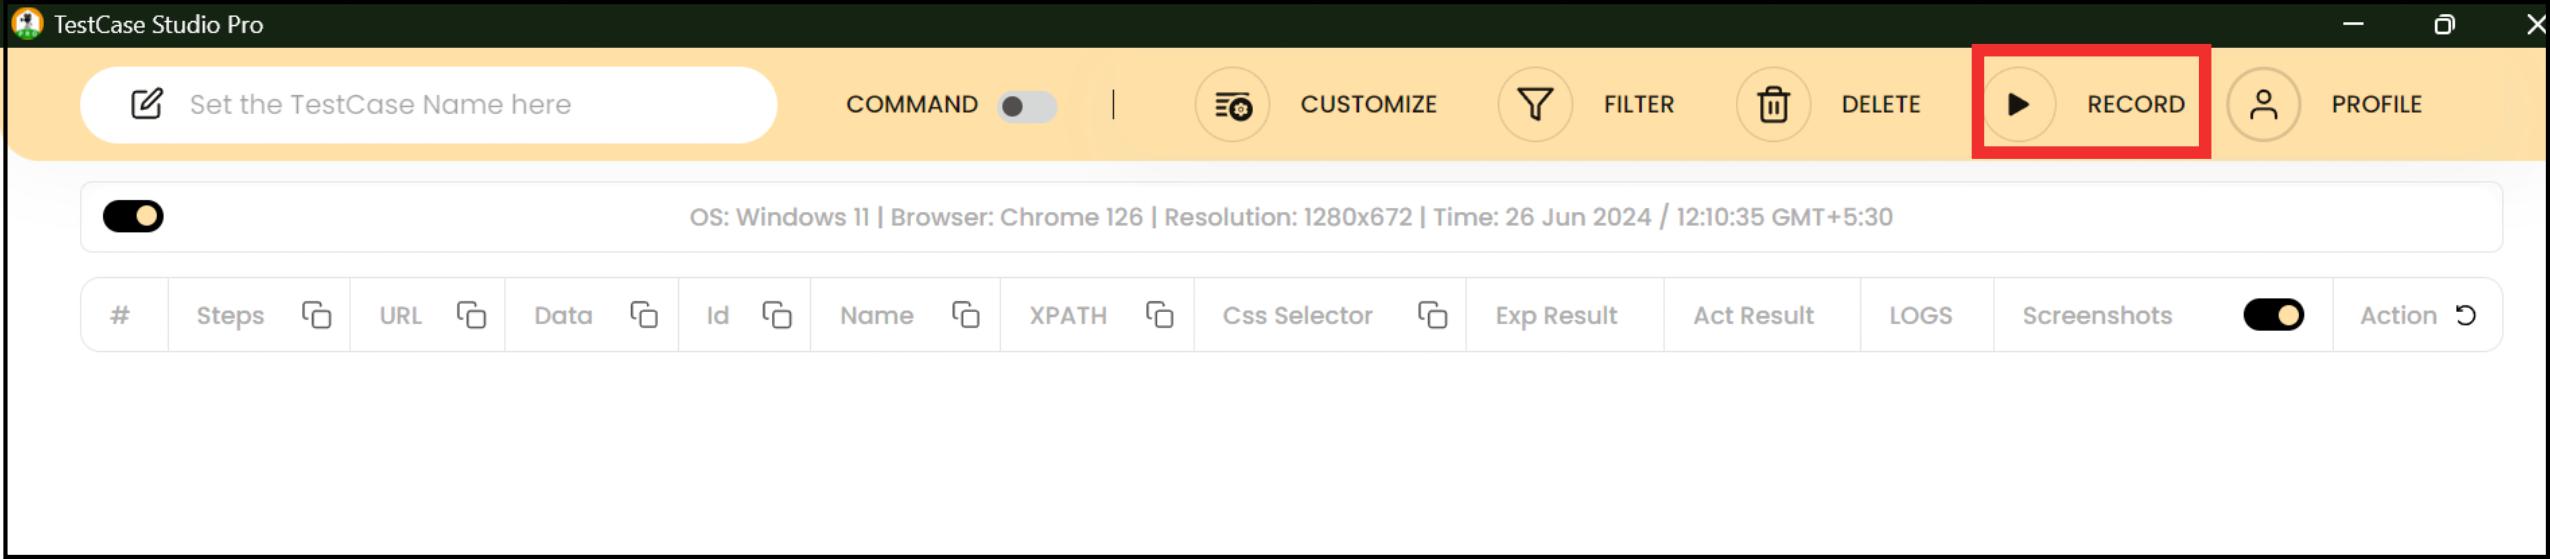
1.Start Recording: Begin your screen recording session as usual.
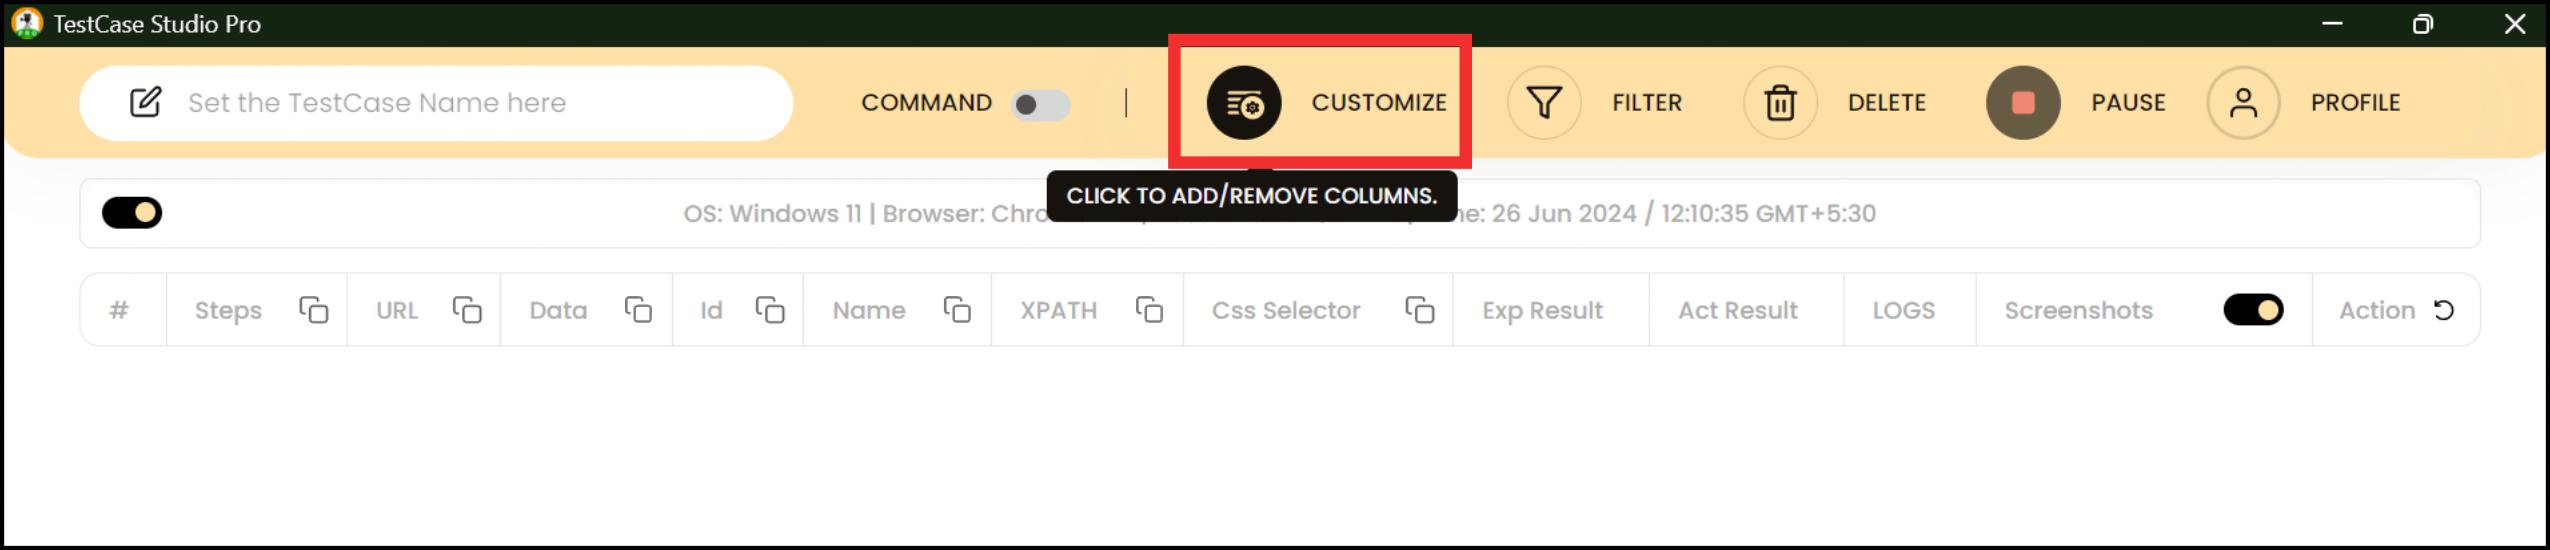
2.Access Customize Options: During the recording, click on the "Customize" option available in the TestCase Studio Pro Interface.
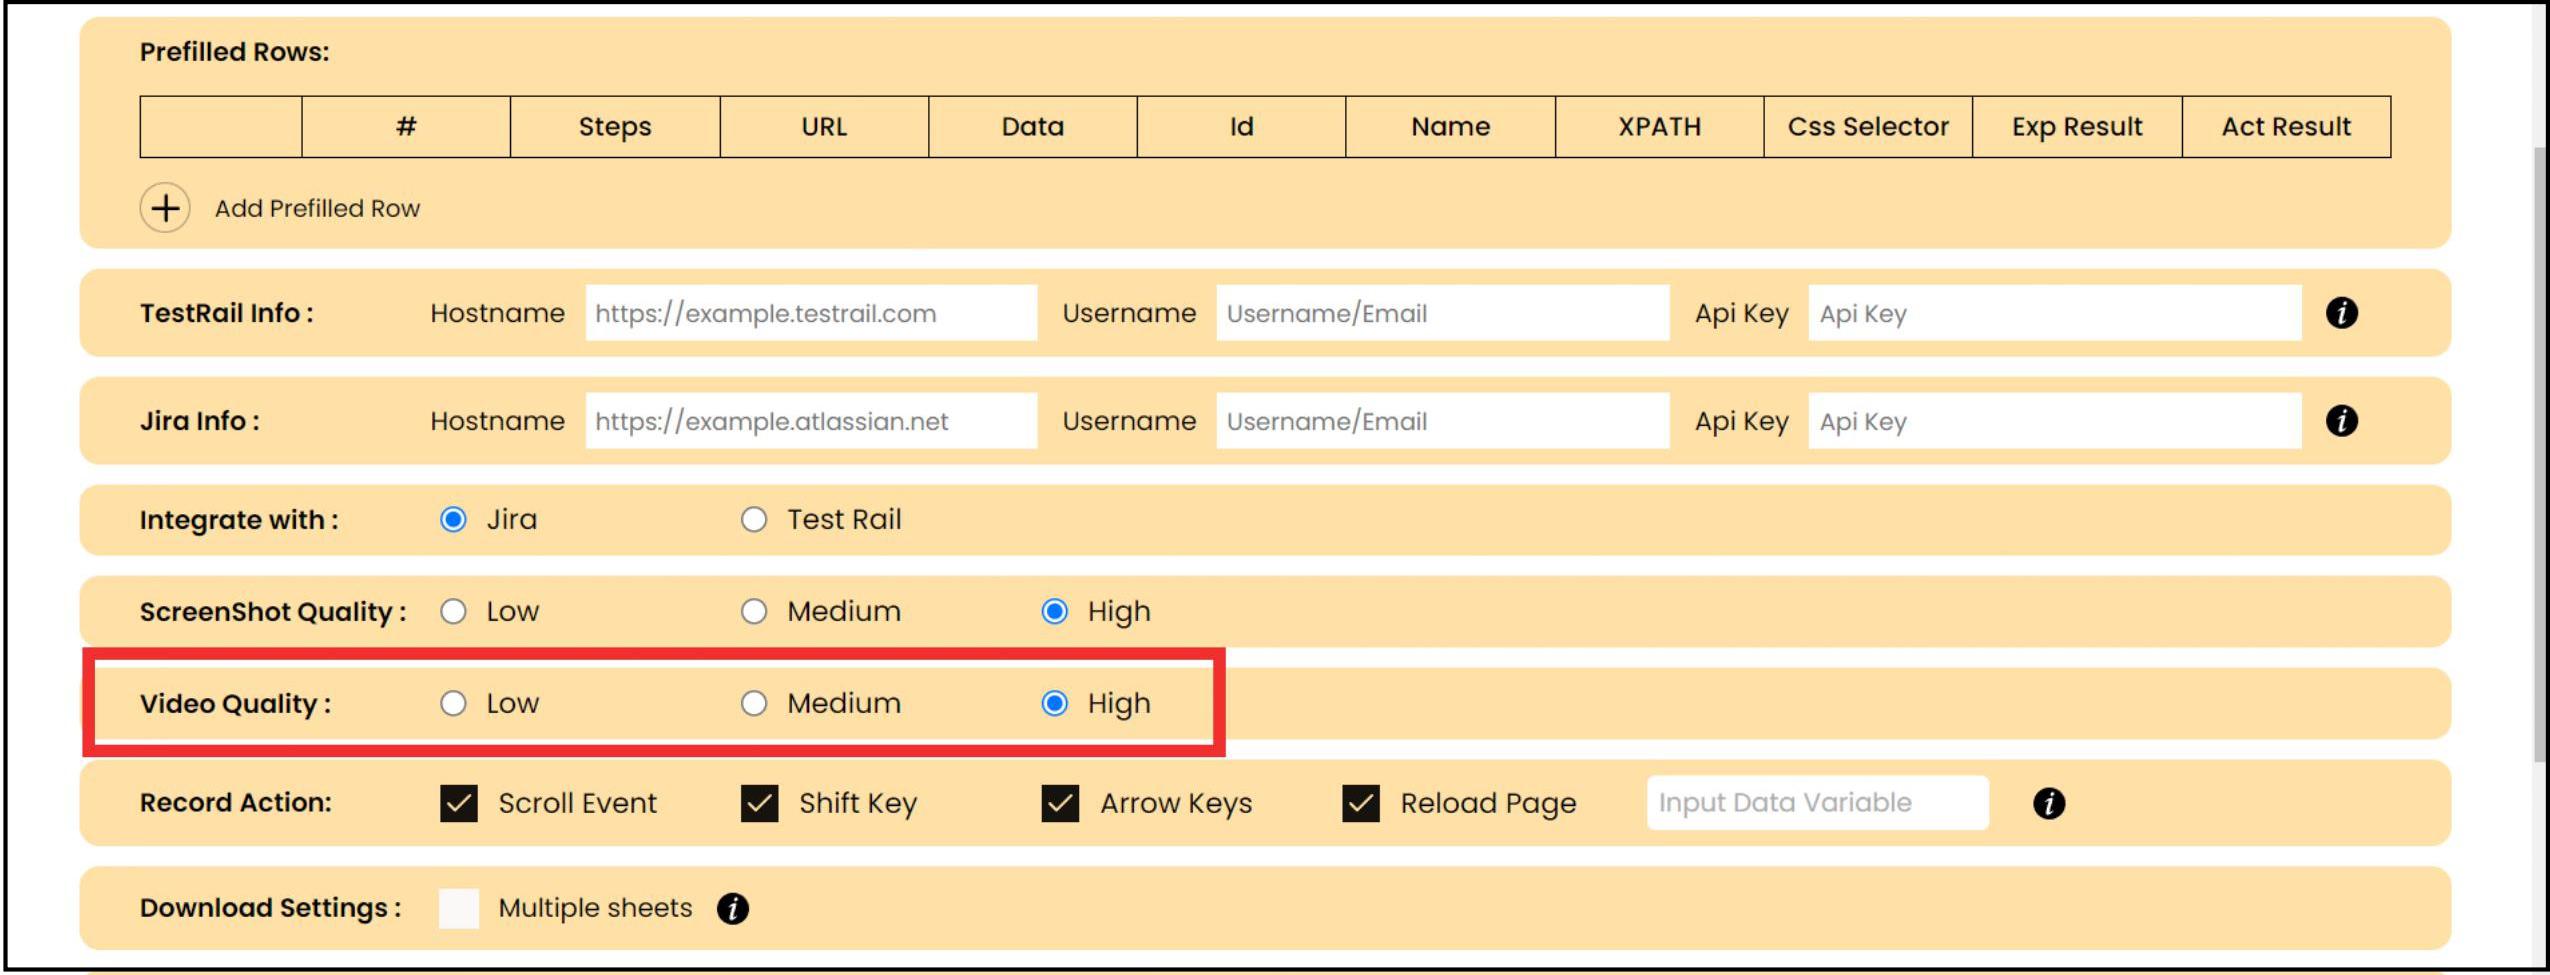
3.Select Video Quality: You will see an option for video quality where you can choose between low, medium, or high. By default, it is set to high.
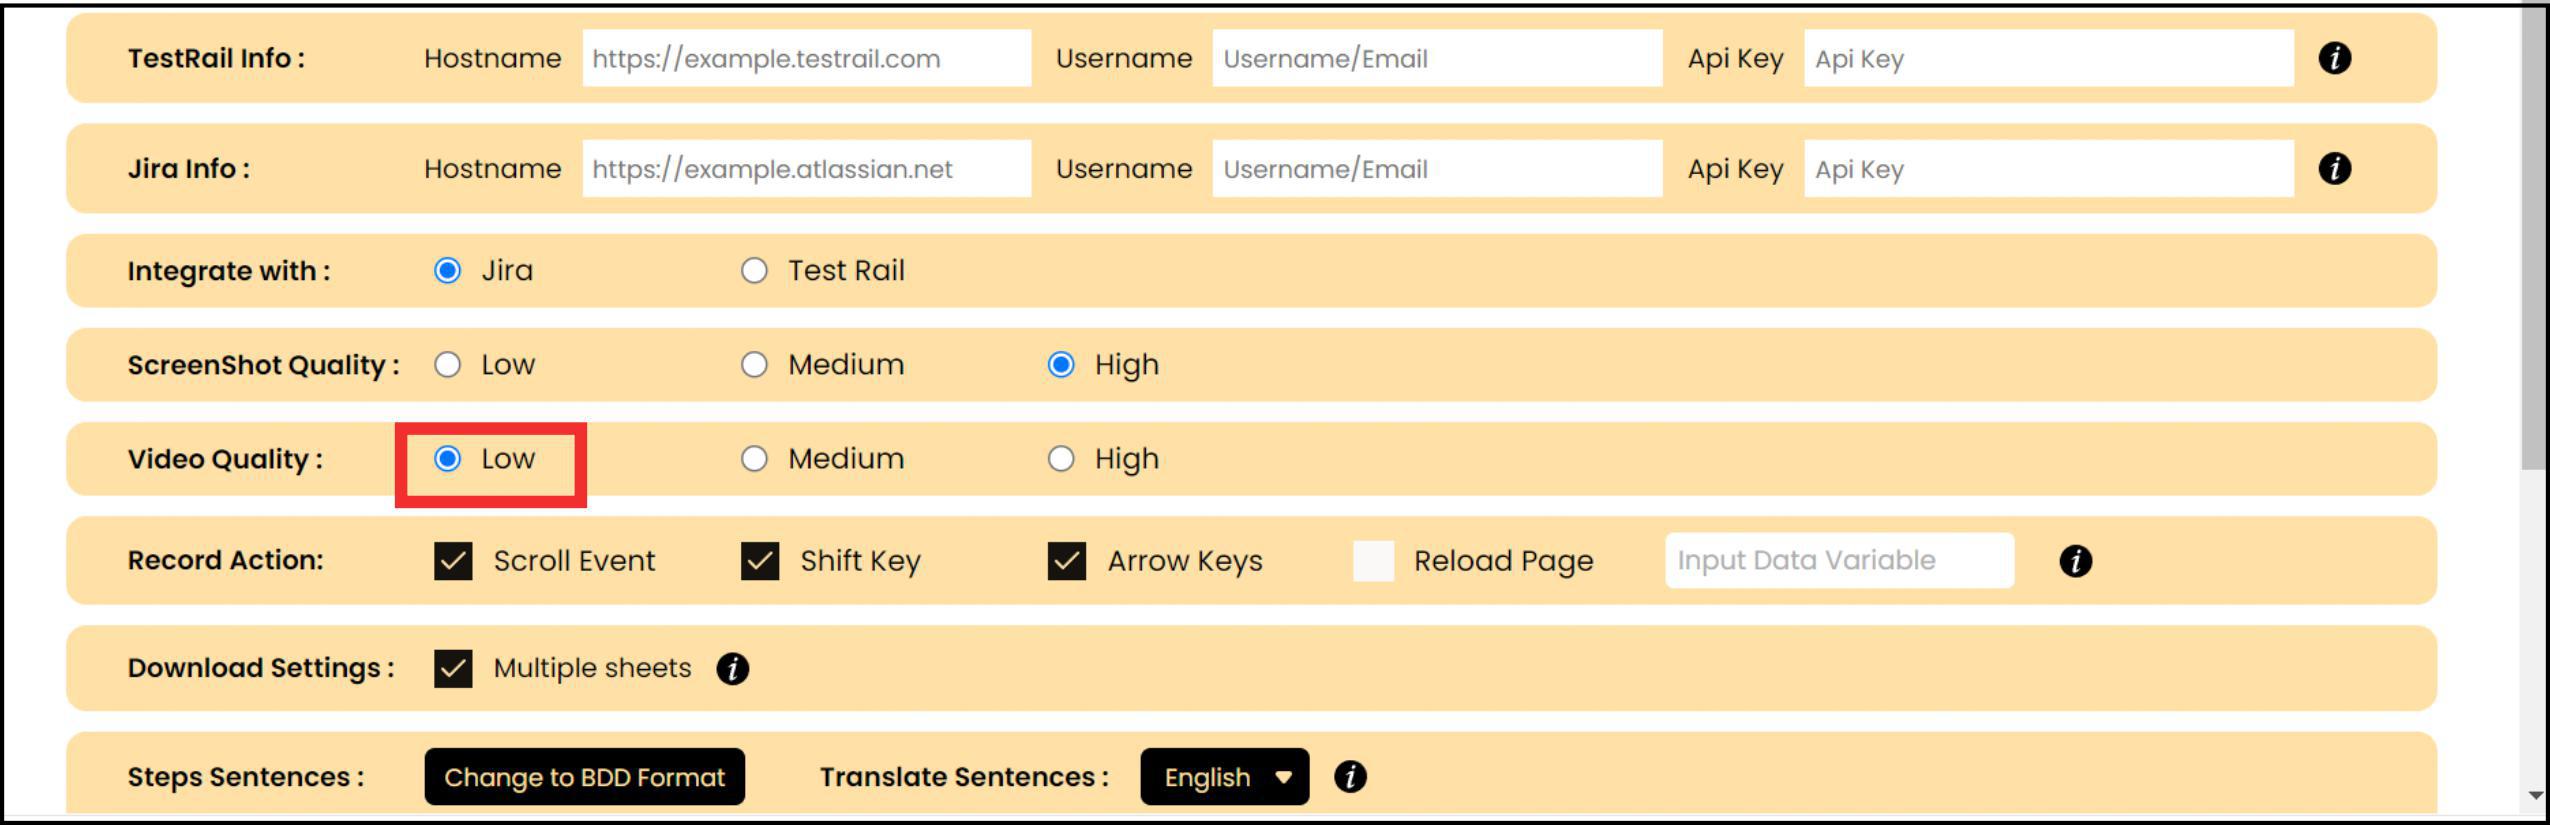
4.Choose Desired Quality: Select the desired quality level (e.g. low) to reduce the file size.
5.Apply and Record. The selected quality will be automatically applied. Continue with your recording.
6.Check File Size: After recording, you can download and check the file size to ensure it meets your requirements.
This feature helps in optimizing memory usage by reducing the resolution and file size of the recordings, which is particularly useful for bug filing or proof of testing purposes.