
With TestCase Studio Pro’s new feature, uploading test cases to TestRail has never been easier. Users can now seamlessly integrate test case recording with TestRail, including the option to upload test cases with or without screenshots. Here’s a step-by-step guide to make the most of this feature:
Steps to Upload Test Cases to TestRail
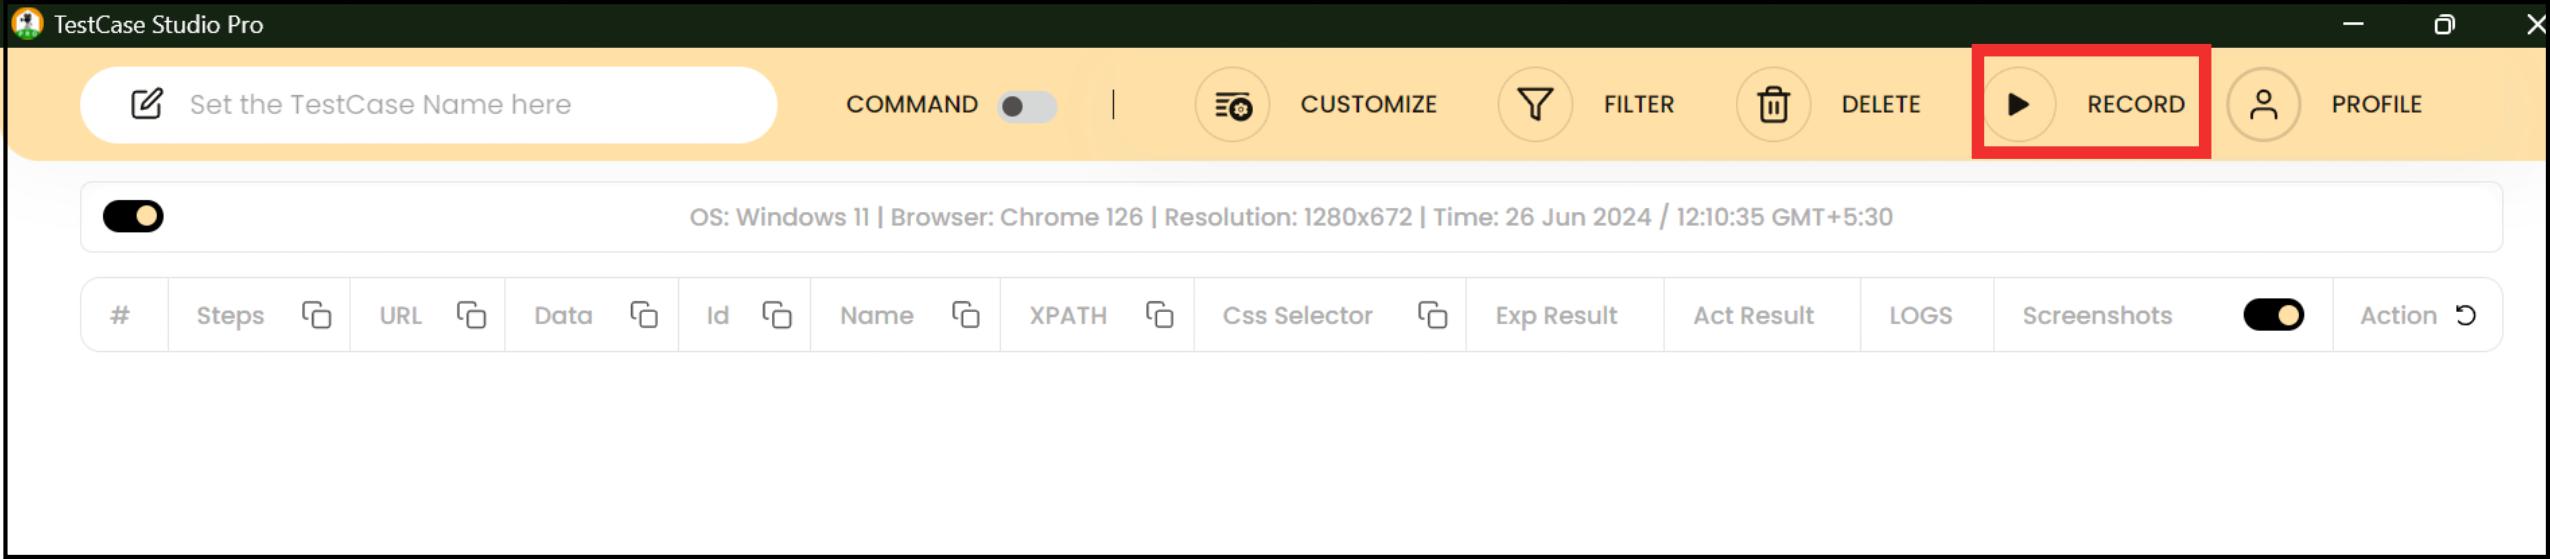
1. Record Your Test Cases
Open TestCase Studio Pro and start recording your test cases.
Ensure all necessary steps and screenshots are captured during the recording process.
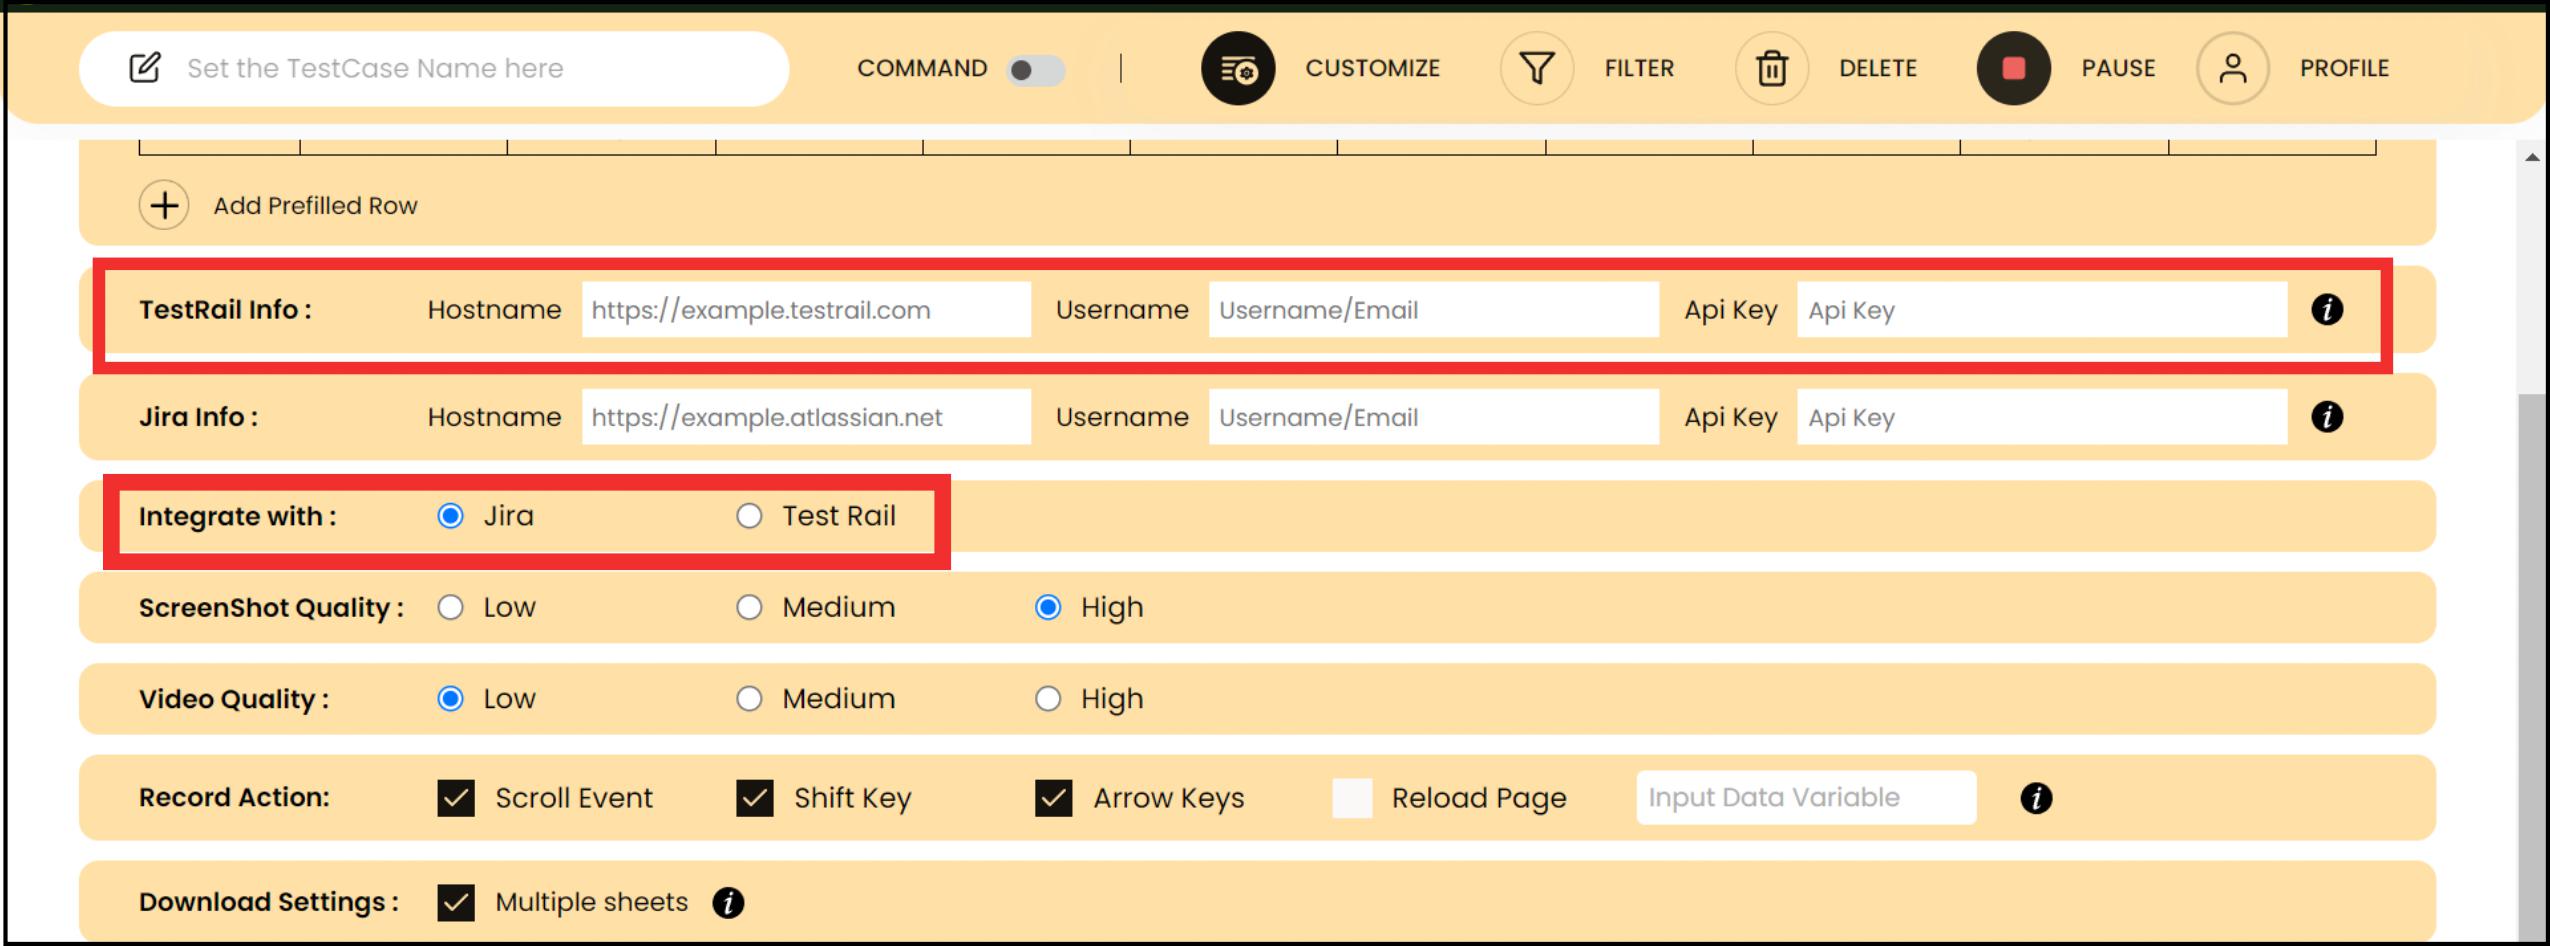
2. Configure Integration Settings
Navigate to the Customization section in TestCase Studio Pro.
Select TestRail as the integration option instead of Jira.
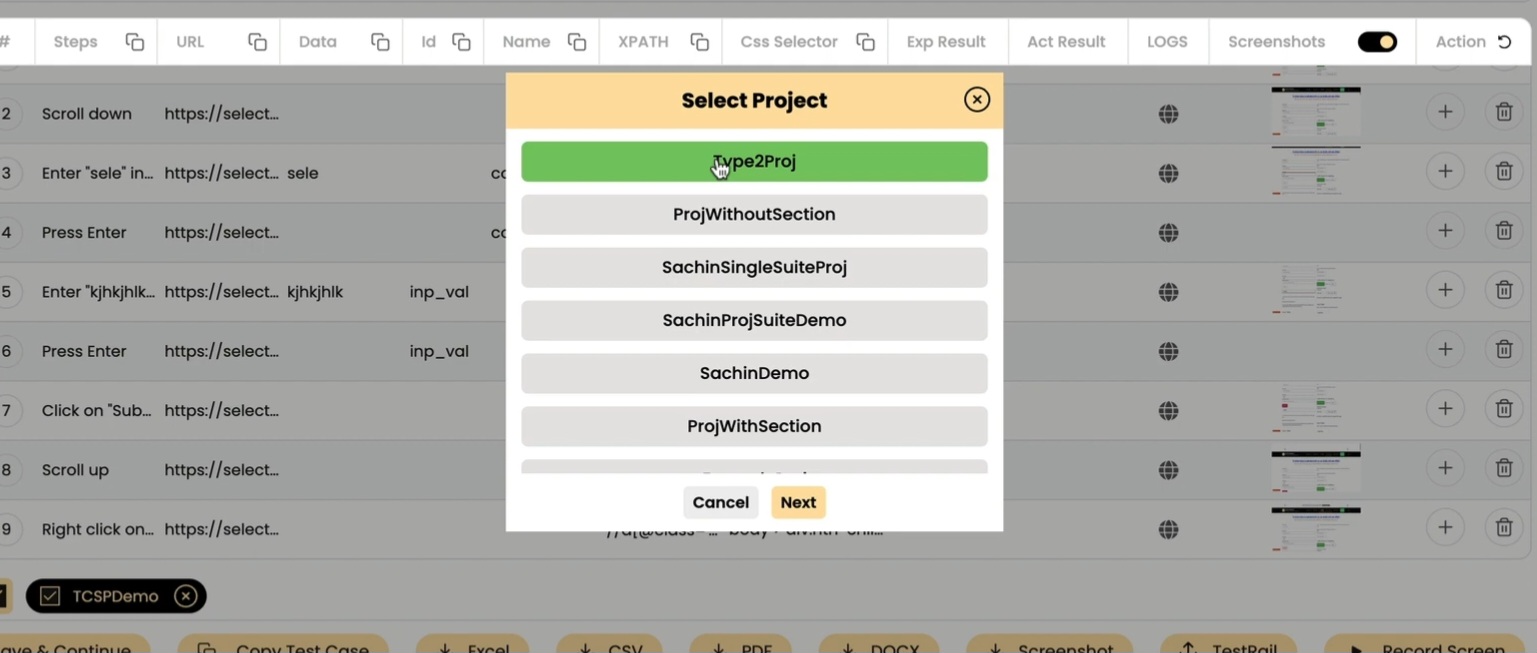
3. Select Project and Test Suite
When ready to upload, click on the Upload to TestRail option.
Choose the appropriate project and test suite where the test cases should be uploaded.
4. Choose Upload Option
With Screenshots:
Select the option to upload with screenshots.
This will include all recorded steps and their associated screenshots.
Without Screenshots:
Choose to upload without screenshots if only the steps are needed.
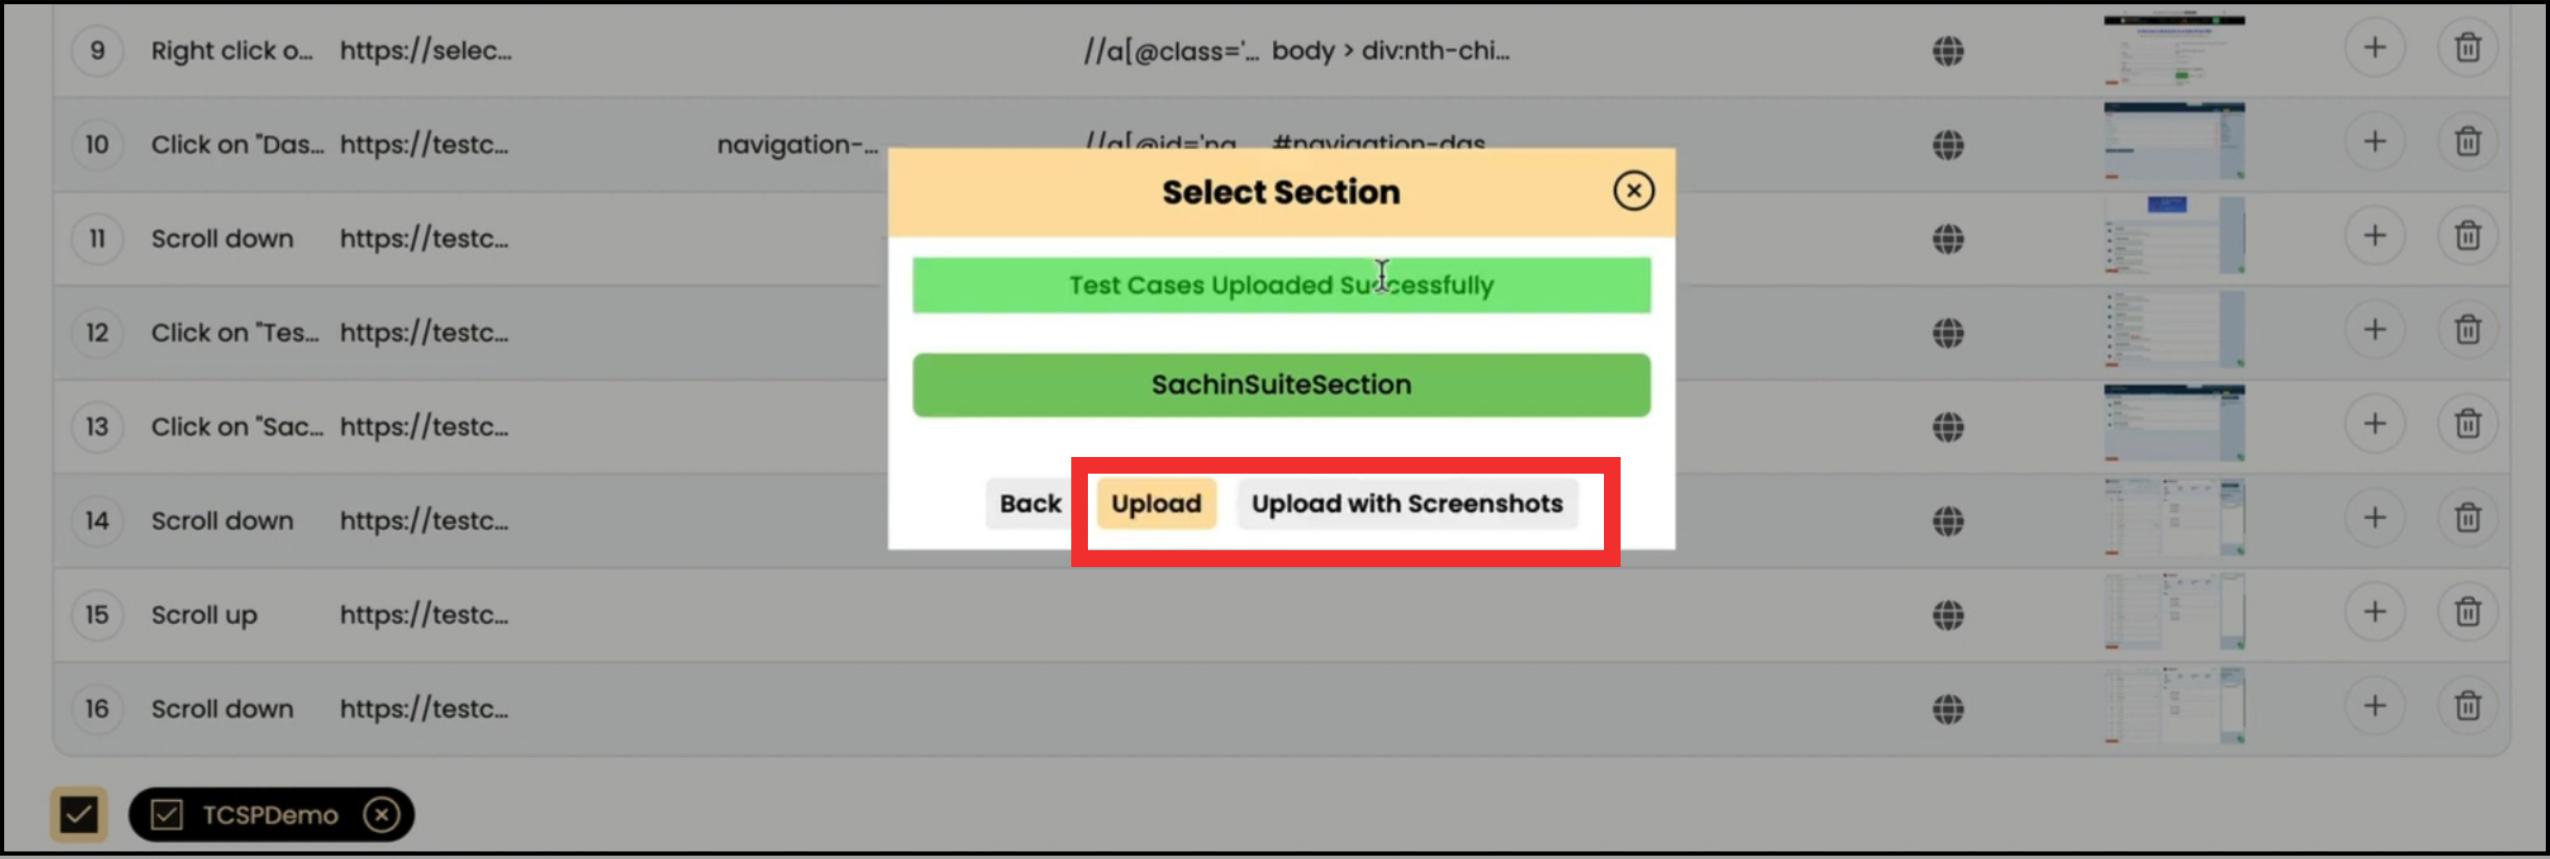
5. Upload Test Cases
Click the Upload button. TestCase Studio Pro will automatically upload the selected test cases to your specified TestRail project and suite.
6. Verify the Upload
Open your TestRail account and check the specified project and test suite.
Ensure that all test cases and screenshots (if selected) have been successfully uploaded.